Your business has outgrown Webflow. Whether it’s the integration limitations, the lack of data control, or the cost of scaling on a platform that wasn’t built for serious ecommerce, it’s time to move on.
As your ecommerce operation expands, it’s smart to choose a platform that supports that growth with the right integrations and ability to adapt.
Migrating from Webflow to WooCommerce gives you full ownership of your store and the flexibility to build what your business actually needs. This guide walks you through the process, step by step.
- Migrating from Webflow to WooCommerce involves moving your store’s data, design, and integrations to an open source ecommerce platform you fully control.
- This migration gives you ownership of your data, access to a larger ecosystem of integrations, and the ability to scale and customize your store.
- Migrating to WooCommerce is ideal when you’ve outgrown Webflow’s limitations.
- The process requires exporting product data, rebuilding in WordPress, and reconnecting integrations.
Webflow is a website builder that lets you design, build, and launch websites with a visual editor. When you run a store on Webflow, you can design without coding, and you’ll have access to tools for creating product catalogs, managing inventory, and processing orders.
While Webflow works for small stores, its ecommerce capabilities are limited when it comes to advanced functionality, such as third-party integrations. This makes it difficult to scale your store as your business grows.
WooCommerce is an open-source ecommerce platform for merchants who want to own their store — not rent it. That means choosing your own hosting provider, customizing your design without restrictions, accessing your database directly, and connecting to any third-party tool via API or plugin. No landlord, no limits.
With WooCommerce, businesses of all sizes and niches sell physical and digital products, subscriptions, memberships, and more. Its vast ecosystem of extensions facilitates seamless integrations with payment gateways, shipping providers, marketing tools, and enterprise-level software.
Built with the flexibility of WordPress, WooCommerce scales with your business.
When you work for an established ecommerce business, moving from Webflow to WooCommerce unlocks growth, flexibility, and complete control over your website.
Here’s why WooCommerce is the ideal choice for online stores:
1. Full ownership and control
Table of Contents
- 1 1. Full ownership and control
- 2 2. Unmatched flexibility and customization
- 3 3. Extensive integrations and API access
- 4 4. A large, active community and expert support
- 5 5. SEO and marketing capabilities
- 6 6. Scalability and performance
- 7 7. Transparent and scalable pricing
- 8 Step 1: Audit your current Webflow site
- 9 Step 2: Set up your WordPress and WooCommerce environment
- 10 Step 3: Export data from Webflow
- 11 Step 4: Import data into WooCommerce
- 12 Step 5: Rebuild your store design
- 13 Step 6: Reconnect integrations and extensions
- 14 Step 7: Test, optimize, and launch
- 15 Step 8: Optimize for growth
- 16 Q: Is it difficult to migrate from Webflow to WooCommerce?
- 17 Q: Why switch from Webflow to WooCommerce?
- 18 Q: How long does it take to migrate from Webflow to WooCommerce?
- 19 Q: What data can you export from Webflow?
- 20 Q: Will the migration negatively impact my SEO?
- 21 Q: How does WooCommerce support ecommerce scalability?
- 22 Share this:
- 23 Like this:
WooCommerce is an open source platform, meaning you’re in full control of your business. Here are a few key differences:
- Hosting control: While Webflow stores your data on proprietary servers, WooCommerce lets you choose a hosting provider, giving you full control over customer information, sales history, and product catalogs.
- Regulatory compliance: Not only does this aid compliance with corporate policies, GDPR, and other regulations, but it also enables your business to tailor security protocols. This includes enterprise-grade SSL configurations, firewalls, and regular performance audits
- Functionality implementation: With WordPress plugins as well as WooCommerce integrations and extensions, you can add new functionality in the future. Webflow limits you to its proprietary, built-in features.
For example, you may struggle to integrate a custom enterprise resource planning (ERP) system with Webflow. But WooCommerce supports seamless integration with enterprise-level software via extensions or the REST API.
2. Unmatched flexibility and customization
WooCommerce runs on WordPress, an open source platform with an impressive ecosystem of custom plugins and extensions. These give you the power to choose when and how to add the features and capabilities your ecommerce site needs as you scale. WooCommerce is also developer-friendly.
Whether your team is building checkout flows, implementing loyalty programs, or connecting to specialized APIs, WooCommerce makes the work straightforward with hooks, filters, and custom code options.
3. Extensive integrations and API access
Many enterprise ecommerce operations rely on integrations across multiple systems and marketing channels.
With WooCommerce, you can connect to ERP systems, CRMs, marketing automation tools like Klaviyo, and shipping/logistics providers. You’ll also have access to REST APIs and webhooks to enable automated workflows, real-time inventory updates, and custom reporting dashboards.
4. A large, active community and expert support
WooCommerce has a helpful community of developers, agencies, and community resources. This means that if you encounter a problem while working on your store, you’ll be able to get expert assistance quickly.
There are even certified WooCommerce agencies to help with migrations, custom development, and large-scale optimizations.
5. SEO and marketing capabilities
WordPress provides you with full control over search engine optimization, with many robust SEO plugins available. Most of these tools also have WooCommerce-specific features. You can expect advanced control over product metadata, sitemaps, schema markup, structured data, and more.
WooCommerce also facilitates marketing integrations. Connect directly to email platforms like Klaviyo and MailPoet, CRM tools, and advertising networks to automate campaigns and track performance.
6. Scalability and performance
WooCommerce is built to scale and support high-growth ecommerce operations. The platform can handle large product catalogs, traffic spikes during major sales, and complex storefront setups without forcing you into platform limits.
It also gives you the control to shape how your business operates. You can configure pricing models, subscriptions, workflows, and automation directly within your store. And because you’re not tied to a single hosting environment, you can choose the infrastructure, caching, and CDN setup that best supports scalability.
7. Transparent and scalable pricing
WooCommerce also offers better ROI for larger stores. High-volume transactions on platforms like Webflow can lead to expensive monthly fees. WooCommerce pricing provides predictable and scalable costs.
As your business grows, you can upgrade hosting plans, add premium extensions, or hire developers to build out your site. There are no subscription commitments with WooCommerce, and you’ll never be penalized for growth.
Migrating from Webflow to WooCommerce will give you greater flexibility, scalability, and control over your store. In this tutorial, we’ll walk through the key stages of migrating from Webflow to WooCommerce, covering everything from data export to design rebuilds and integrations.
Step 1: Audit your current Webflow site
Before you start the migration process, take inventory of what’s currently on your store. This will help you determine which elements can be migrated automatically and which will need to be rebuilt or reconfigured manually in WooCommerce.
Here are some things to make a note of:
- Exportable assets. You can migrate products, categories, customer data, and static content (like blog posts or landing pages) to WooCommerce.
- Non-exportable elements. Some design components, custom animations, and dynamic interactions built with Webflow’s visual editor are not transferable. So, decide which design elements you wish to recreate in your new WooCommerce store.
- Integrations. List any current tools on your store (like payment gateways, shipping apps, and CRMs) to identify equivalent alternatives or improved integrations in WooCommerce.
Also, set a reminder to cancel your Webflow plan (and any related subscriptions) after you complete the migration.
Step 2: Set up your WordPress and WooCommerce environment
Once your audit is complete, you can set up your new ecommerce environment, starting with a reliable hosting plan.
For unrivaled performance, select a managed WooCommerce hosting provider like Pressable. Not only are managed plans built specifically for WordPress, but they also handle tasks like security monitoring, server management, and performance optimization on your behalf. With Pressable, you’ll also benefit from:
- Enterprise-grade, cloud-based servers optimized for WordPress sites.
- Smart staging environments for testing major changes before launch.
- A Jetpack Security plan included, with real-time backups, security monitoring, spam prevention, and more.
- Auto-scaling, so your site never slows down when it’s most popular.
- A 100% uptime guarantee.
- Free speed tools, like a global CDN.
- Automatic failover, which loads your site to another server if a problem ever arises.
Here’s a curated list of our recommended WooCommerce hosts for additional options.
Once you’ve chosen a host, set up WordPress and WooCommerce by following this guide.
Step 3: Export data from Webflow
Now that you have the basics set up, you can migrate your products. Webflow lets you export product data as a CSV file. To do this, navigate to the Ecommerce panel, click Products, then click the Export button.
You can also export collections (categories, tags, or CMS-based content) and static content (via manual HTML export or API calls).
Unfortunately, Webflow doesn’t provide built-in tools to download customer accounts or order history (transactions, totals, or payment data) for privacy and compliance reasons.
If you need to preserve order or customer data, here are your options:
Use the Webflow API (partial access)
The Webflow Ecommerce API can retrieve limited order data, including order IDs, product names, and customer contact information. If you’re working with an experienced developer, they can script this data extraction and reformat it into a CSV suitable for WooCommerce import.
However, payment data, such as card details and full transaction logs, is never exposed via the API.
Export manually via the dashboard
Webflow allows you to view orders in your dashboard. If your team has the time and resources, you can copy order details or export customer contacts manually.
Of course, this may be inefficient and time-consuming for large-scale migrations.
Use third-party migration tools
Tools like LitExtension support partial Webflow to WooCommerce transfers via API connections. However, Webflow’s API is restrictive, so you may need to use these tools alongside manual verification for accuracy.
If you’re unable to migrate all details, keep your Webflow store active (in read-only mode) for historical data retention and reference.
Additionally, you’ll want to migrate only active customers. Then, invite them to reactivate their accounts in your new WooCommerce store.
Step 4: Import data into WooCommerce
Now that your data is exported, it’s time to import it into WooCommerce.
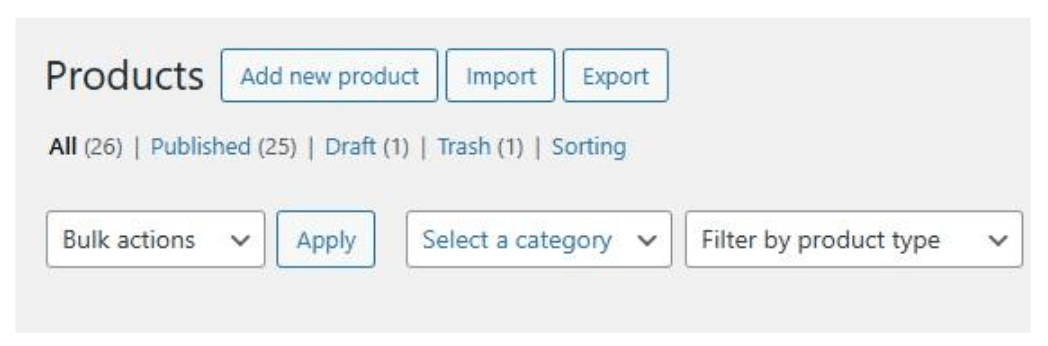
In your WordPress dashboard, go to Products → All Products and click on the Import button.
You can then upload the CSV file that you exported from Webflow:
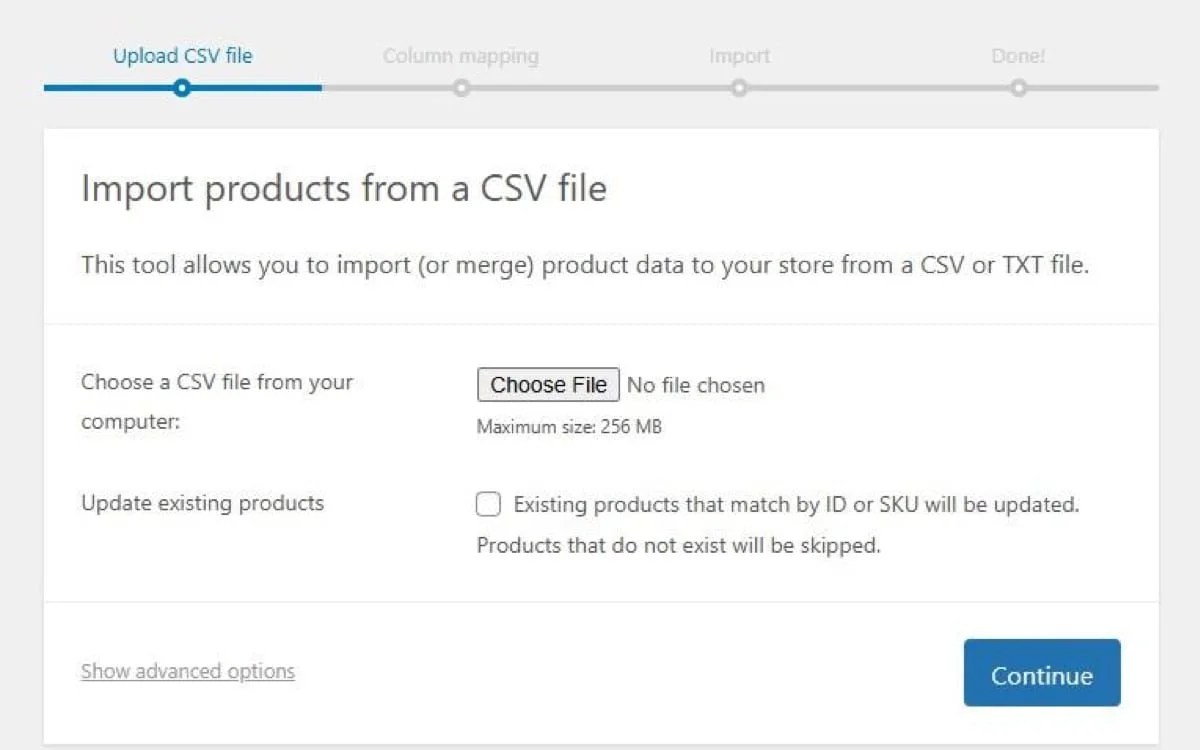
Match each CSV field to the correct WooCommerce field (e.g., name, SKU, price, image URL).
Once the import is ready, your products will appear in the All Products page. Your team may need to review the items or conduct spot checks to ensure the data was transferred properly.
For customers and orders, use a tool like WP All Import to import the data.
Consider working with a Woo Agency Partner to handle complex migrations from Webflow to WooCommerce. These certified agencies manage large dataset transfers, data mapping, and automation, while also recreating custom design systems and workflows in WordPress. They typically provide post-launch support and performance optimization to keep your store stable and scalable during high-traffic periods.
Step 5: Rebuild your store design
Since Webflow’s design system doesn’t directly translate to WordPress, you or your developer will need to rebuild your site’s design.
The good news is that WordPress comes with a block editor that lets you create templates and pages with pre-made elements (or blocks). You also have access to thousands of customizable themes designed specifically for online stores.
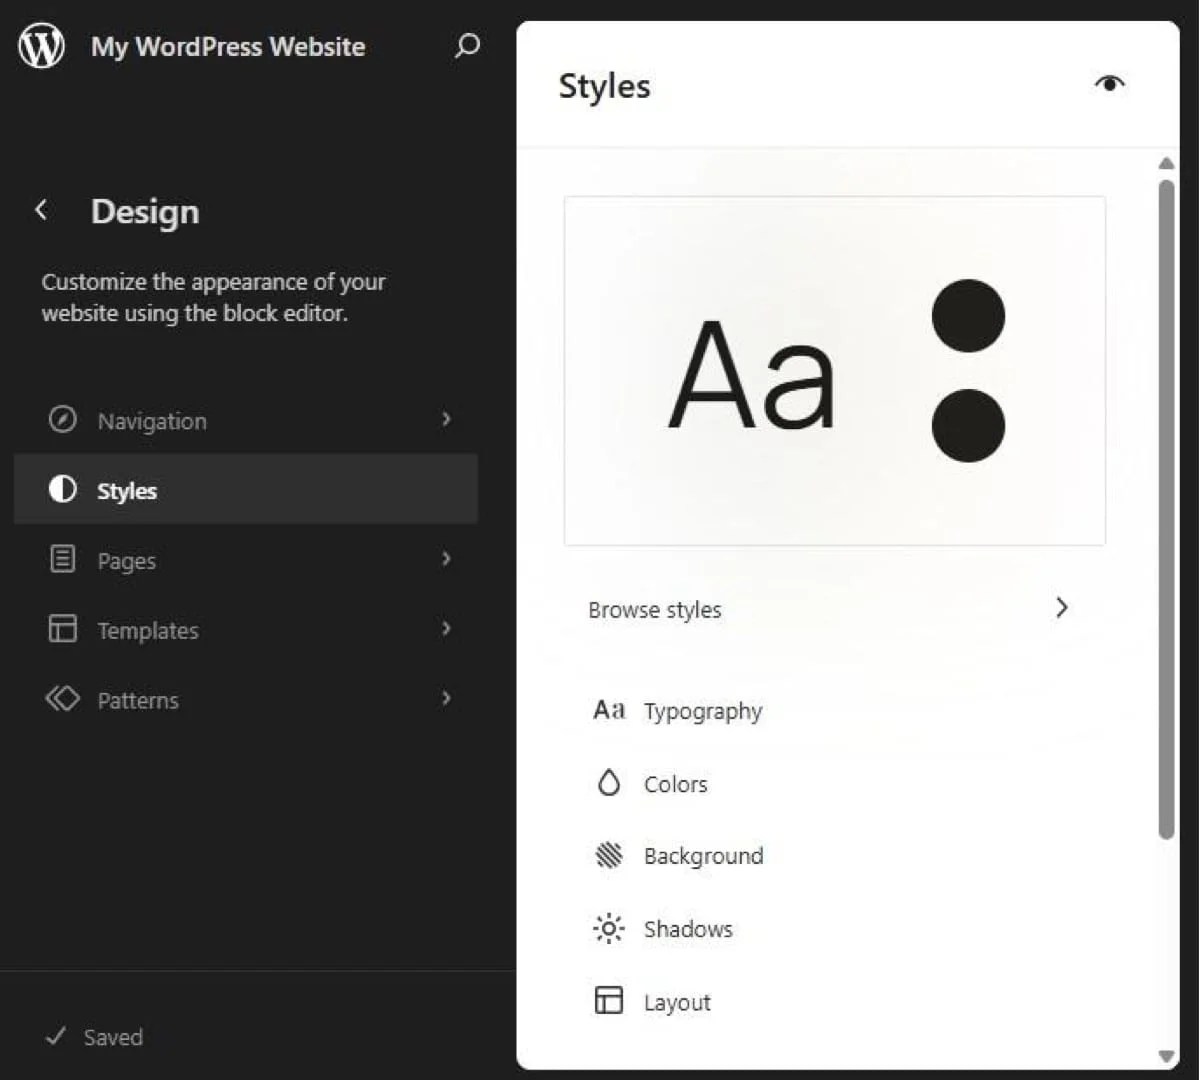
Start by choosing a theme for your business. This will serve as the design foundation of your site, but don’t worry if the theme doesn’t match your branding or style. You can simply customize colors, typography, and other global elements with the WordPress Site Editor.
In your WordPress dashboard, go to Appearance → Editor and click on Styles. Then, choose an element you want to customize, such as typography, colors, or background.
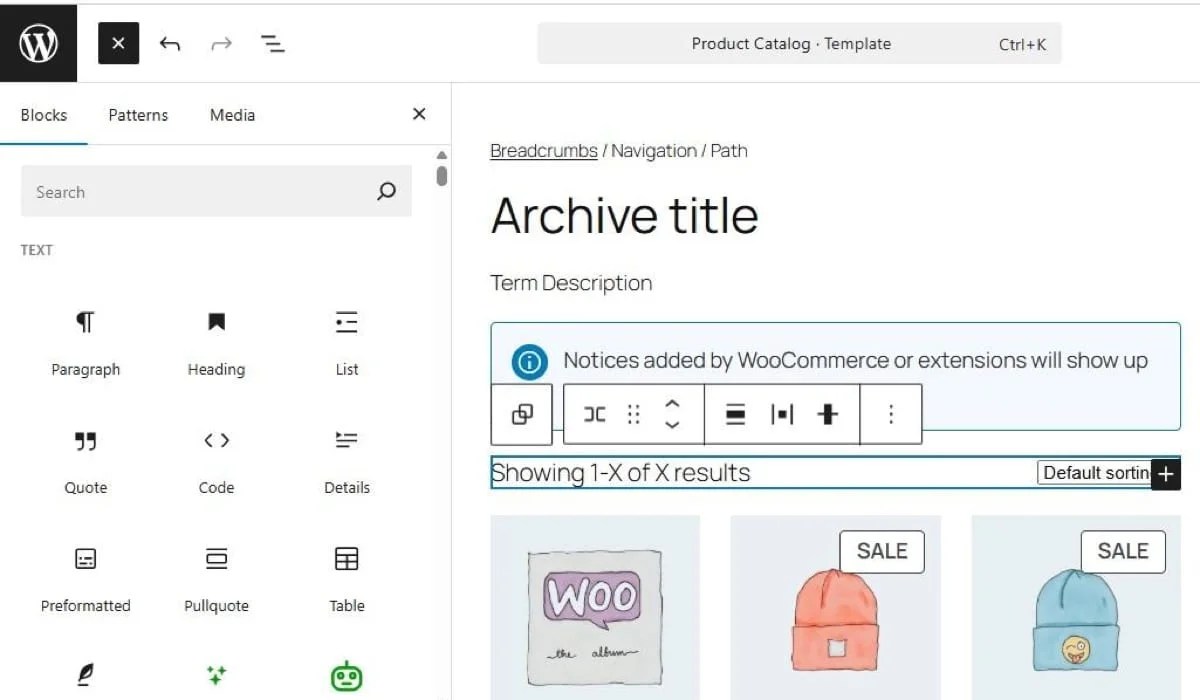
Match your brand styles by selecting fonts, color palettes, and layout spacing. If you navigate to Templates, you’ll see a list of all available options, including the front page (or homepage), single post, and ecommerce templates like cart, checkout, order confirmation, product catalog, and single product.
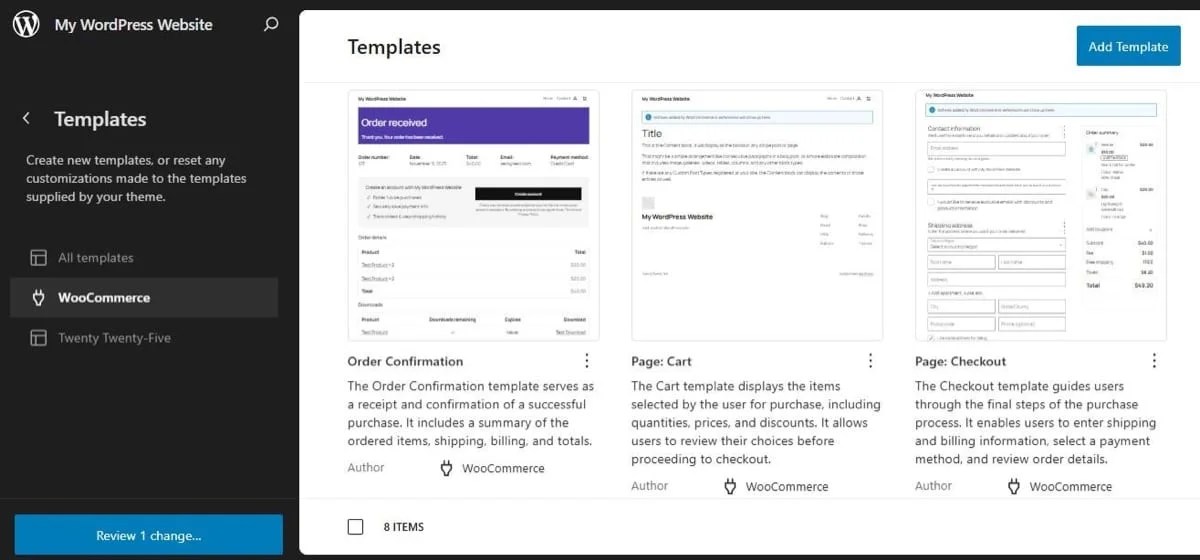
Select a template you want to customize. You can add, remove, or edit blocks to create the layout you’d like.
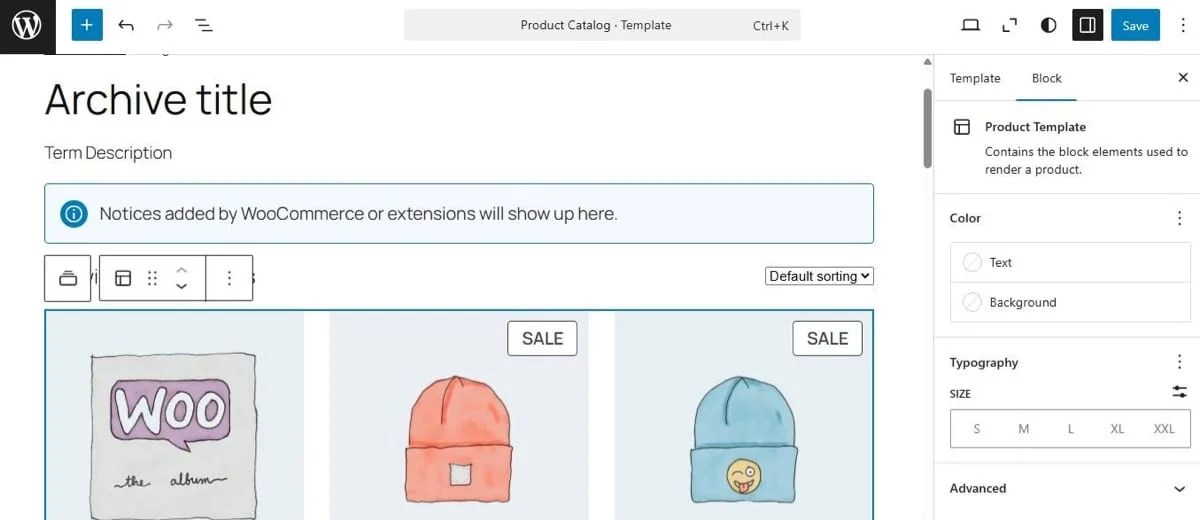
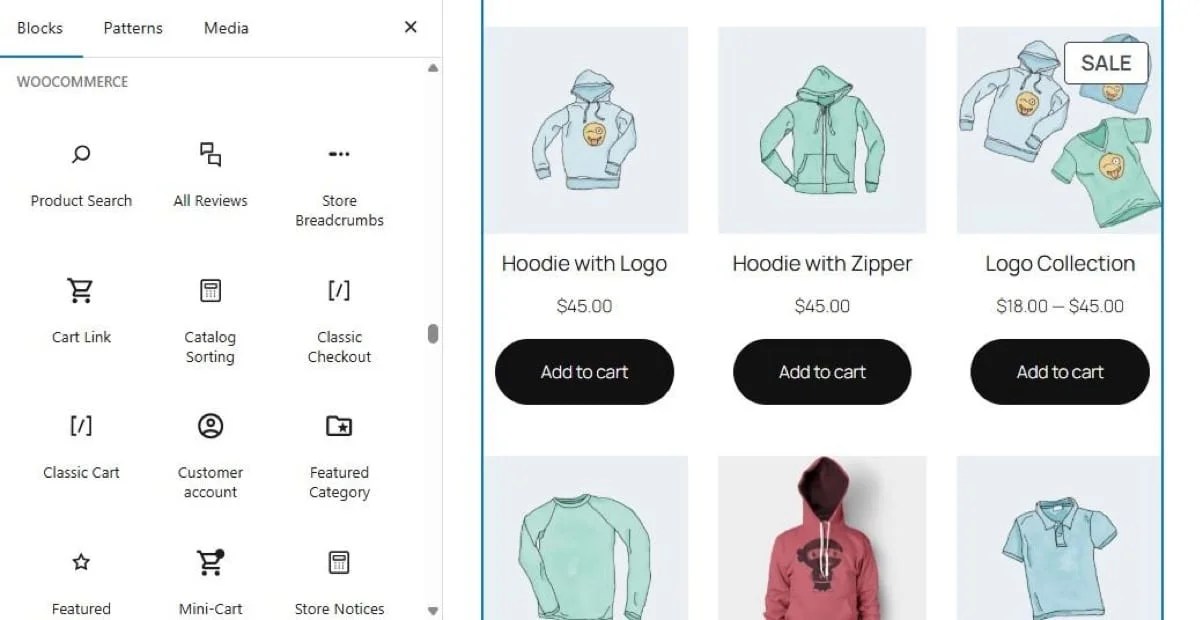
Just click on the plus (+) icon and choose a block. There are dozens of elements, including text, headings, buttons, galleries, social media icons, and more.
You also have access to a wealth of WooCommerce blocks, which include product search, featured products, on sale products, upsells, product filters, new arrivals, and more.
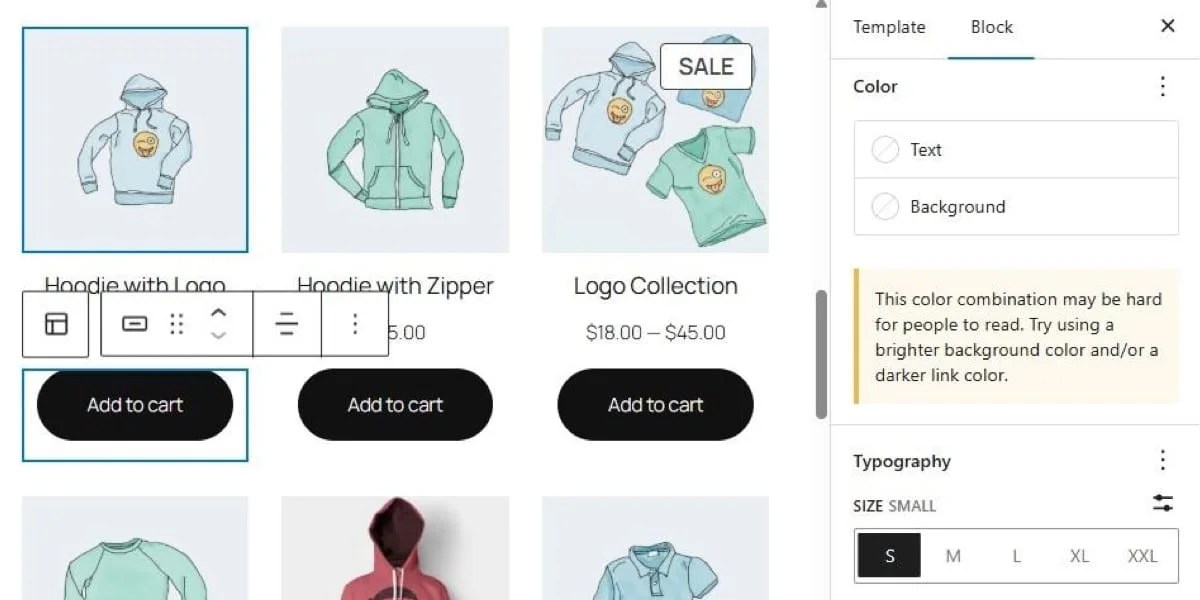
When you add a block to the page, you can use the settings panel on the right to customize it. For instance, if you have an Add to Cart button, you could change the text and background colors.
When you’re done, simply publish your changes. Note that you can also create new pages and blog posts using the block editor.
For more details, check out:
Step 6: Reconnect integrations and extensions
Now it’s time to reconnect your key operational tools. If you made a list of them in the first step, open that up now.
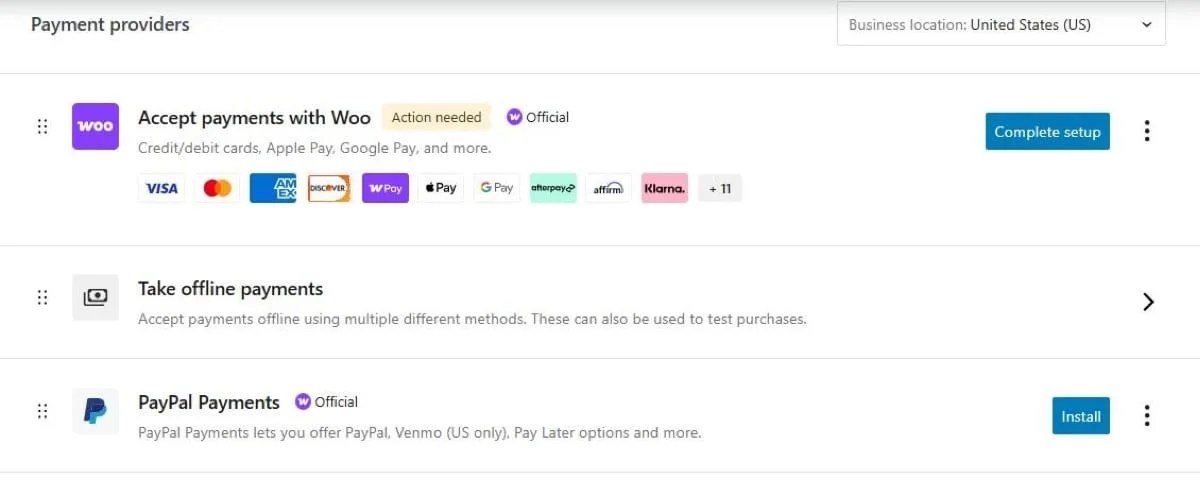
A good place to start is with your payment gateway. WooCommerce integrates with all major providers, including Square, PayPal, Stripe, Amazon Pay, and many global gateways. See a full list here. You can find specific instructions for setting up each one in the extension’s documentation.
If you want to switch payment gateways, WooPayments is an excellent option. With a single tool, you can accept credit and debit cards, digital wallets like Apple Pay and Google Pay, in-person payments, and more.
To set this up, go to WooCommerce → Settings → Payments and enable WooPayments.
Now is also a good time to integrate the following software:
The WooCommerce extension marketplace has more than 800 tools. So, nearly any Webflow app you’re currently using has a WooCommerce equivalent or upgrade.
Step 7: Test, optimize, and launch
Before going live, test every part of your WooCommerce store thoroughly. This should include:
- Functional testing: Check product listings, cart functionality, checkout flow, payment processing, and email confirmations.
- Performance testing: Use tools like GTmetrix or Pingdom to assess page speed and load times, and check your store’s Core Web Vitals using PageSpeed Insights. You’ll likely want to install a performance solution like Jetpack to keep your shop in tip-top shape.
- Security checks: Install SSL certificates, enable two-factor authentication, and configure backups. Jetpack Security, included with some hosting plans, offers everything from real-time backups to malware scanning and spam prevention.
Once you’ve tested everything, update your DNS settings to point your domain to your new WooCommerce store. Your domain might be registered with Webflow or with a third-party registrar such as GoDaddy, Namecheap, or Google Domains.
Check your Webflow hosting settings to confirm your DNS provider. Then, log into your domain account and update the A record to your new host’s IP address. You’ll also need to update the CNAME record for “www” to point to the same domain (e.g., yourstore.com). You can find specific instructions from your DNS provider or their support team.
Remember to remove or replace any Webflow-specific DNS records.
DNS changes can take anywhere from a few minutes to 24 hours to propagate. During this time, your website will be unavailable. To minimize impact on operations, schedule your switch during a low-traffic period.
Step 8: Optimize for growth
Once your WooCommerce store is live, you can start scaling and optimizing. For example, you can:
- Add custom functionality: This may include tiered pricing, wholesale portals, or subscription billing, all of which are available with WordPress plugins and WooCommerce extensions.
- Content and SEO: With WordPress, you can also publish optimized landing pages and blog content directly on your store to drive organic traffic.
- Automation: Use plugins like Klaviyo or AutomateWoo to automate order follow-ups, abandoned cart recovery, and email sequences.
The WordPress and WooCommerce ecosystems are vast, giving you access to thousands of plugins and integrations to support business growth. So, take your time to explore!
Migrating from Webflow to WooCommerce supports long-term growth, control, and flexibility. While Webflow offers sleek design capabilities, WooCommerce provides a complete, enterprise-grade ecommerce solution with full data ownership, endless customization options, and seamless integration with thousands of third-party tools.
The migration process includes exporting your product catalog, rebuilding your storefront design, and reconnecting your core integrations. With the right preparation, you can launch a store that’s faster, more flexible, and fully aligned with your business goals. Plus, you can work with Woo Agency Partners who specialize in Webflow-to-WooCommerce migrations and will guide you through every step of the process.
Ready to get started? View the full WooCommerce feature list or explore our documentation.
Q: Is it difficult to migrate from Webflow to WooCommerce?
A: Migrating from Webflow to WooCommerce is not difficult if you follow the right process, but project complexity differs by store. Some larger ecommerce operations work with developers or agencies to handle data mapping and rebuilds.
Q: Why switch from Webflow to WooCommerce?
A: WooCommerce provides full data ownership, deeper customization, and broader integration options compared to Webflow. This flexibility is better for businesses that need to scale beyond Webflow’s platform limitations.
Q: How long does it take to migrate from Webflow to WooCommerce?
A: Migration timelines vary, but most projects take anywhere from a few days to several weeks. Larger stores with custom functionality or high data volumes typically take longer.
Q: What data can you export from Webflow?
A: Webflow allows you to export product data, collections, and some CMS content as CSV files. Customer accounts and full order history may require manual or API-based workarounds.
Q: Will the migration negatively impact my SEO?
A: Preserve SEO during migration by maintaining URL structures, setting up redirects, and transferring metadata. Careful planning helps minimize traffic loss.
Q: How does WooCommerce support ecommerce scalability?
A: WooCommerce supports scalability by giving you control over hosting, performance, and integrations, while increasing functionality through plugins and extensions. That means your store can handle more products, traffic, and complexity without platform limits.
About
Brent MacKinnon
Brent MacKinnon is the director of product marketing and developer advocacy at WooCommerce, helping to make the platform better for developers and merchants alike. With over a decade of experience in product marketing and strategy, Brent is passionate about supporting the WooCommerce community and helping entrepreneurs of all kinds succeed with Woo.