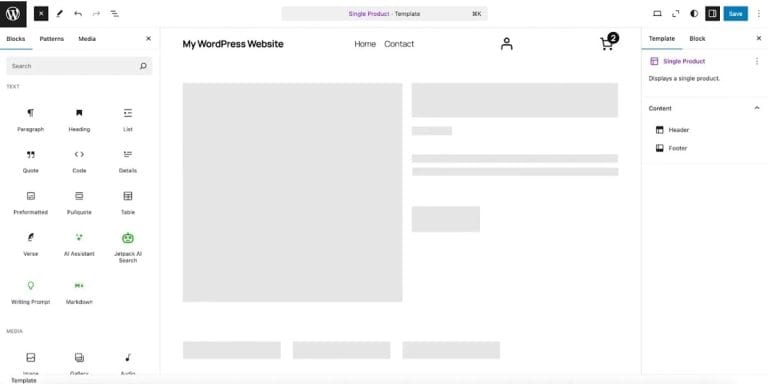
So, you built a Node.js app and want to share it but are unsure how to take it live? Don’t worry. You’ve landed in the right place. As this in-depth blog shares all the steps from setting up to hosting your Node.js application on Cloudways.
But why Cloudways? Because it’s the most trusted platform by developers to host their apps on the cloud. And on Cloudways, every function (no matter how technical) is just a click away.
So, even if you’re a seasoned developer or just someone starting out with Node.js, this guide covers everything you need to launch your app in five easy steps.
Simply put, Node.js gives developers a unified way to create web apps by enabling them to use JavaScript across the board for both client-side and server-side.
Table of Contents
Understanding for NPM
Working with Node.js requires the use of NPM, or Node Package Manager. It allows developers to easily manage the numerous pieces of code (known as packages) required by their projects. NPM allows you to rapidly install and update these packages without manually downloading and configuring them.
When developing a website, you might need features like date management or database connections. Using NPM, you may find ready-made packages that fulfill your requirements rather than having to write all the code yourself.
Why Choose Cloudways for Hosting Node.js Apps?
Cloudways provides a user-friendly environment for managing cloud infrastructure, allowing you to focus on creating your application and business.
It’s an excellent choice for hosting apps like Node.js, considering its features such as automatic backups, effective caching, one-click installations, user-friendly dashboard, and, of course, its 24/7 support to help you at all times.
So, with a managed host like Cloudways, hosting Node.js apps is not only easier but also fruitful. Because you can manage all your apps and servers with quick 1-click operations, saving you time and streamlining all your operations.
Deploy Your Node.js Application with Cloudways Today!
Take advantage of Cloudways 3-day free trial and discover the power of managed PHP hosting for your Node.js application! With no credit card required, you can explore all the features Cloudways has to offer, including one-click application deployment, automated backups, and 24/7 expert support.
How to Hosting Your Node.js Application on Cloudways (Easy Steps)
Now that you know the basics of Node.js app and why you should host it on Cloudways, let’s tackle the “how.” This section covers the 6 easy steps to host your Node.js apps on Cloudways.
1. Log in on Cloudways
- The first and foremost step is to sign in with your credentials on the Cloudways Platform. If you’re not a Cloudways user, sign up here to get your 3-day FREE trial, without even entering your credit card details.
2. Launch a PHP Application
- Now, to set up your Node.js application, start by installing a PHP Application on the Cloudways Platform with a single -click setup.
- Add your application’s name and other details and then click Launch Now.
- Once the application is installed, you can access it using f SSH/SFTP to upload your application data or you can also create your Node application from scratch.
- Access the Node.JS via the SSH terminal provided on the Cloudways platform. For SFTP, you can use any SFTP client, such as FileZilla, PuTTY, etc.
- You can also use Git to manage your Node.js application. This method lets you pull changes directly from your GitHub repository, simplifying the process. For more detailed setup instructions, check out our guide on deploying code to your application using Git on Cloudways.
3. Set Up your Node Application
- Once you access the application with SSH/SFTP, navigate to the public_html folder, where you’ll see a default index.php file.
- Here, we have created a new file named “myApp.js” to add the test code for setting up the Node application.
- Copy the test code as shared below:
myApp.js code
// myApp.js const express = require('express'); const app = express(); // Route to display a message app.get('/', (req, res) => { res.send('<h1>Hello, your Node.js app is running on Cloudways!</h1>'); }); // Start the server app.listen(process.env.PORT || 3000, () => { console.log('Server is running'); });
- Next, we will install basic package.json to be set under public_html folder along with the Express framework.
Why Express Framework?
Many of us know that installing Express is important because it improves Node.js by providing a better framework for building web applications. It simplifies routing, and allows for cleaner and more organized code when dealing with different endpoints.
Express also supports middleware, allowing you to quickly integrate services like logging and authentication. Additionally, it simplifies request and response handling, improves security, and provides access to a rich ecosystem of plugins and community support, making development faster and more efficient.
We can install Express by simply running the following commands:
npm init -y npm install express
4. htaccess Redirection Rule
- Next, we’ll configure the .htaccess file within the public_html directory to route our app to port 3000.
Note: The above step is necessary on Cloudways.
- We have removed the default index.php file from the public_html folder and disabled the DirectoryIndex through the .htaccess file to run the app using it.
- You can adjust this configuration as per your needs, but for our test purposes, we’ll use the approach outlined below:
.htaccess code:
DirectoryIndex disabled # Redirect traffic to your port 3000 RewriteEngine On RewriteBase / RewriteRule ^(.*)?$ http://127.0.0.1:3000/$1 [P,L]
- Before testing the application, make sure that mod_proxy is enabled on your server. For this, you will need to connect with Cloudways support & they will help you enable it in no time.
- If mod_proxy is not enabled, you may see similar errors in the logs, and the application will not work because imod_proxy is disabled by default on Cloudways servers.
- Once your mod_proxy is enabled, we are good to go and test the application to check the output along with the configuration test.
5. Configuration Test
- Now that everything is set up, we can proceed to run our application and test it. For this, run the command “node myApp.js” via the CLI to start the application.
- Perfect! The application is running as expected. Now, let’s set it up with PM2.
Why Use PM2?
PM2 is necessary because if you close your SSH session, the application will stop running. To keep it running in the background, you can use a process manager like PM2.
PM2 Installation
Run the following commands to install PM2 with your master user:
cd && echo "export PATH='$PATH:/home/master/bin/npm'" >> .bash_aliases cd ~ && echo "export NODE_PATH='$NODE_PATH:/home/master/bin/npm/lib/node_modules'" >> .bash_aliases npm config set prefix "/home/master/bin/npm/lib/node_modules" cd && echo "alias pm2='/home/master/bin/npm/lib/node_modules/bin/pm2'" >> .bash_aliases npm install pm2@latest -g source ~/.bashrc pm2 -v
PM2 is now installed, and you’re all set to start your Node app with it. Execute the command to run it with PM2, and your application will continue running smoothly in the background.
Wrapping Up!
Using Cloudways to host your Node.js application helps you smoothly use JavaScript’s capabilities on both the client and server sides.
With Cloudways’ powerful infrastructure, user-friendly UI, and support for widely used frameworks like Express, it improves your PHP application’s speed and ease the deployment process. By following the instructions provided in this guide, you can quickly set up your Node.js application, manage your files, and ensure your project functions properly.
Regardless of your experience level, Cloudways offers the resources and adaptability required to make your web apps a reality. And with Cloudways, you can make the most of Node.js’ potential and take your work to the next level!
Salwa Mujtaba is a Technical Content Writer at Cloudways. With a strong background in Computer Science and prior experience as a team lead in Cloudways Operations, she brings a deep understanding of the Cloudways Platform to her writing. Salwa creates content that simplifies complex concepts, making them accessible and engaging for readers. When she’s not writing, you can find her enjoying good music, reading a book, or spending quality time with her family.